|
NEW - Add a Client/Intake a Client – Intake a client into your project |
|
- Go the project in which you want to enroll the client and click the Add a client / intake a client button.

- On the Search across VESTA for a client screen, enter the client’s VESTAcard ID, SSN, or Last Name AND Date of Birth (DOB), and then click Search.

- To minimize the creation of duplicate records, this search will look at all agencies using VESTA to determine if the client already has a record anywhere in VESTA. If you need to clear the fields to search again, click the Start Over button.
If your client is active in VESTA and has signed a VESTA Client Consent for Data Sharing, the search will find a matching record for them. Your client’s name and demographic information will show in the search results. Confirm that the information matches the client you wish to intake into your project. Click on +ADD new intake for ClientPublicID. If there is no match for your client, click +Click Here to Create A New Client Record.
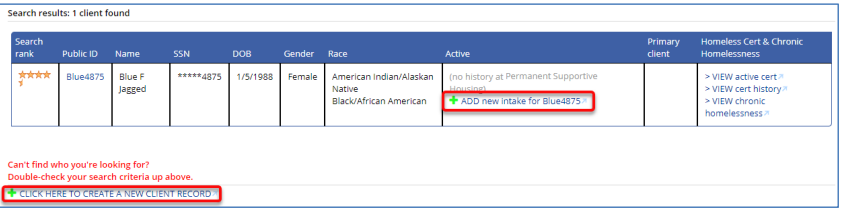
If your client is already active in your project, your search will show that client as present.

If the search results show No clients found, VESTA could not find an existing record for your client. Click +Click Here to Create A New Client Record.

The Entry Wizard will launch to walk you through all the screens and elements required for your project. If your client was already in VESTA, the Basic Client Info screen will be filled in with information recorded by the project that previously served the client. Verify that the data is accurate, add any missing information, and make corrections. Click the NEXT button on the lower right of the screen to move through all required screens.